


Example how to start WordPress (or any other container) in Docker Compose
(Terminal commands are bolded in the text)
Familiarize yourself with docker: https://docs.docker.com/get-started/docker-overview/
On minimum read through:
- What is a container: https://docs.docker.com/get-started/docker-concepts/the-basics/what-is-a-container/
- What is an image: https://docs.docker.com/get-started/docker-concepts/the-basics/what-is-an-image/
- What is a registry: https://docs.docker.com/get-started/docker-concepts/the-basics/what-is-a-registry/
- What is Docker Compose: https://docs.docker.com/get-started/docker-concepts/the-basics/what-is-docker-compose/
- More in detail: https://docs.docker.com/compose/intro/compose-application-model/
Note that you don’t need to install Docker on your machine to learn the concepts, but you can if you want to.
Understanding what the WordPress site needs to work:
- docker-compose.yml
- Without using compose.yml you would need to manually run each instance and combine them manually
- Wordpress as a PHP server
- MySQL as a database
Log on to the odroid:
- ssh utu@odroid
- You wont need a password
Create the folder structure and files
- mkdir -p wp-dev/wp-content
- touch wp-dev/compose.yml
- touch wp-dev/dump.sql
- note that they dump.sql is optional, but we are going to include it in here
Add the basics WordPress structure to your compose.yml
-
nano compose.yml
-
add the following to your compose.yml file:
services: wordpress: image: wordpress:latest container_name: wordpress volumes: \- ./wp-content:/var/www/html/wp-content environment: \- WORDPRESS_DB_NAME=wordpress \- WORDPRESS_TABLE_PREFIX=wp_ \- WORDPRESS_DB_HOST=db \- WORDPRESS_DB_USER=root \- WORDPRESS_DB_PASSWORD=password depends_on: \- db \- phpmyadmin restart: always ports: \- 8080:80 <br/>db: image: mariadb:latest container_name: db volumes: \- db_data:/var/lib/mysql \# This is optional!!! \- ./dump.sql:/docker-entrypoint-initdb.d/dump.sql \# # # environment: \- MYSQL_ROOT_PASSWORD=password \- MYSQL_USER=root \- MYSQL_PASSWORD=password \- MYSQL_DATABASE=wordpress restart: always <br/>phpmyadmin: depends_on: \- db image: phpmyadmin/phpmyadmin:latest container_name: phpmyadmin restart: always ports: \- 8180:80 environment: PMA_HOST: db MYSQL_ROOT_PASSWORD: password <br/>volumes: db_data:- ctrl+X 🡪 Y 🡪 enter
Notes about the compose.yml file:
- volumes: - ./wp-content:/var/www/html/wp-content syncs your local wp/content/ folder to the containers wp/content directory so that local changes in the files move to the container
- ./dump.sql:/docker-entrypoint-initdb.d/dump.sql automatically imports database’s dump file after MySQL is installed
Starting the container
-
Navigate to the folder (wp-dev) and start the container
-
cd wp-dev
-
docker compose up -d
- By adding the flag -d the containers start running in detached mode and wont interfere with your terminal
- Docker compose up -d will:
- Build images if they aren’t already built
- Creates and starts the containers we defined in our compose.yml file
- Creates networks and volumes as needed
- Our container should now be running! You can confirm this with docker container ps which shows all the running containers
Troubleshooting:_
- You might get error messages if you have multiple containers running at the same time because:
- Port conflicts: only one container per port
- volume and mount conflicts
- network conflicts stemming from overlapping subnets
- name conflicts: no two containers can have the same name
- Its best to stop other running containers or delete them altogether. Recommended way:
- docker container ps -a // will show all running and stopped containers
- docker container ps //shows all the running containers that need to be stopped before removing
- docker container stop
- Add the containers ID in
- Add the containers ID in
- docker container rm
- Add the containers ID in
- You can remove all the stopped containers by: docker container prune
- Add the containers ID in
Add content to your wordpress site :
- Open the port https://localhost:8080
- Port is defined in compose.yml file: ports:
- 8180:80 - You will land on Wordpress Installation setup page:
- Choose wanted language
- Fill the values:
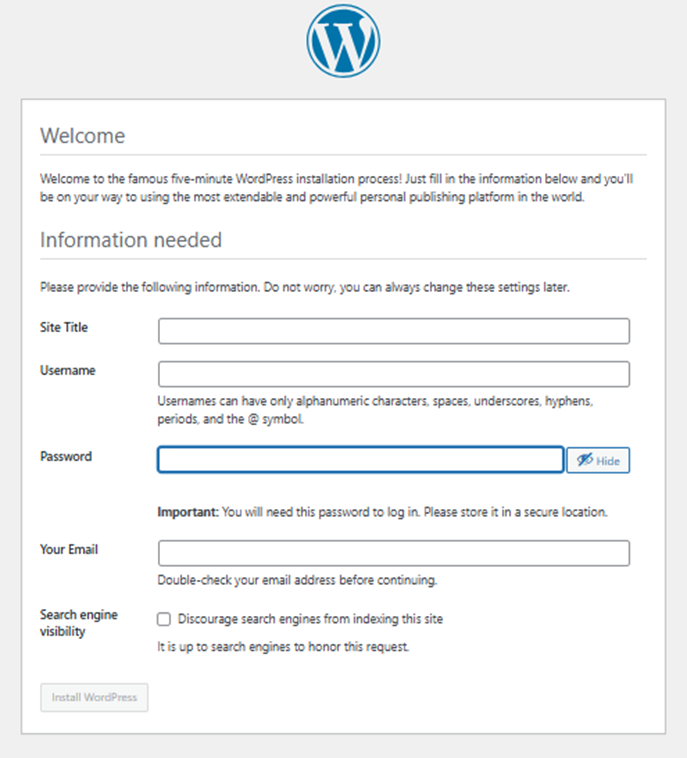
- site title, username, password can be anything, STORE YOUR USERNAME AND PASSWORD
- Press Install WordPress and it should take you to a login page: use the username and password you used in last step
- Go to https://localhost:8080/wp-admin
- Navigate from the admin panel to the Plugins from the left panel: https://wordpress.org/documentation/article/manage-plugins/
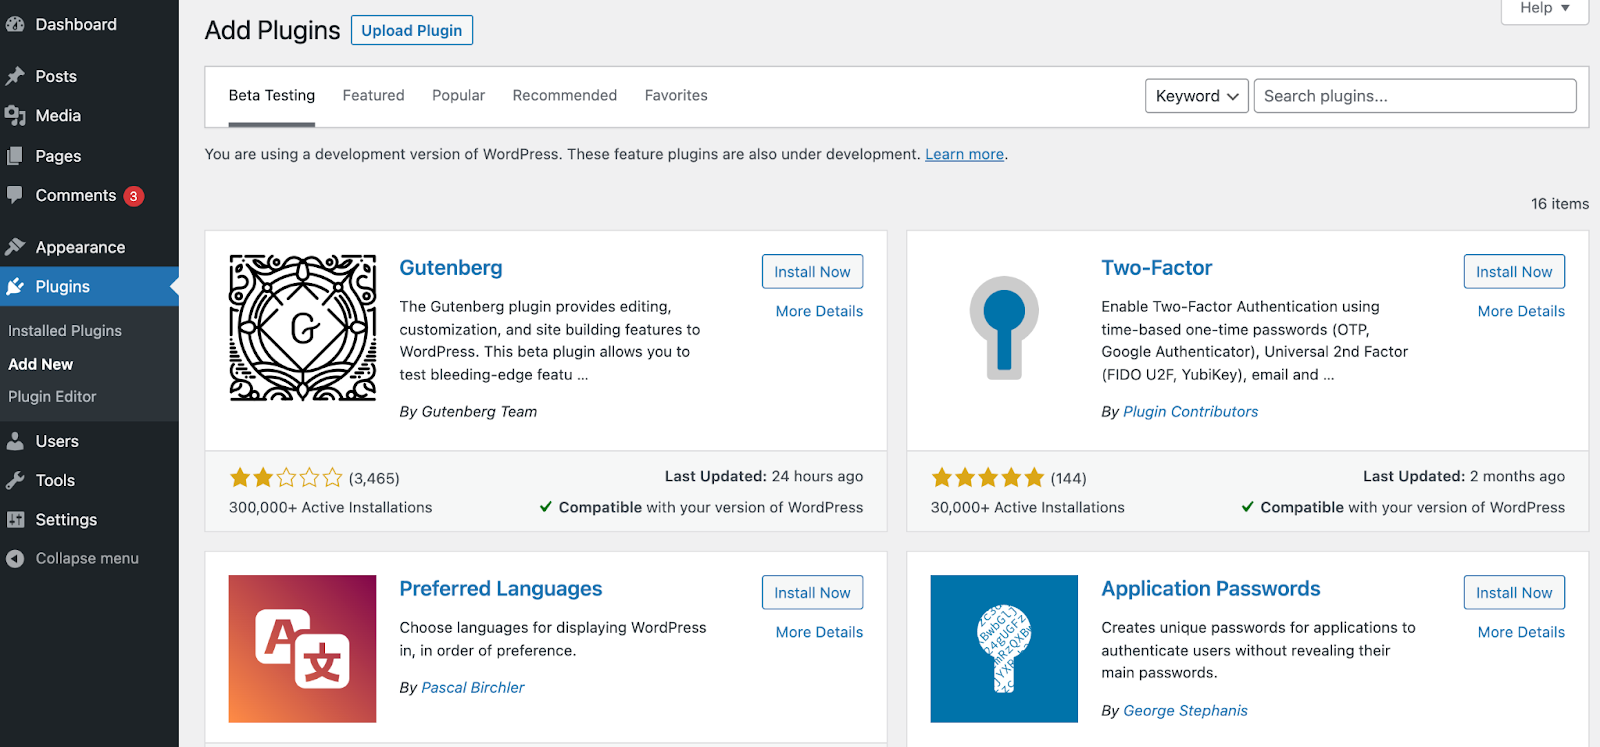
- Plugins > Add New
- Search for WP dummy content 🡪 Click on Install Now button 🡪 Click Activate button
- After successful installation and activation, WordPress will redirect you to the WP Dummy Content Generator landing page. 🡪 choose wanted specs (you can choose whatever)
- Port is defined in compose.yml file: ports:
Stop and remove container, network and volumes created with docker compose up -d
- docker compose down
- What happens:
- Container is stopped and removed, default network is removed, anonymous volumes are removed (note that our volumes aren’t deleted because they are bind mounted with volumes: - ./wp-content:/var/www/html/wp-content 🡪 it’s not a docker managed volume and thus not affected by the docker compose down
- What doesn’t happen:
- Images aren’t removed
- Named volumes persists
- Docker files or source code is untouched
- Build cache still exists
Modifying WordPress image
- See available images docker image ls
- (You can remove an image with docker image rmi <IMAGE ID>
- docker run -it wordpress:latest /bin/sh
- This will run a wordpress container from the latest image available, -it combines interactive and terminal flags allowing you to interact with the image via terminal, /bin/sh/ executes a lightweight shell in the container
- NOTE THAT YOU ARE NOW IN A TERMINAL INSIDE THE CONTAINER
- You can exit the containers terminal with exit